As a side project, I recently started experimenting with a web-based multiplayer game. Imagine Overcooked with up to one hundred players on one map. And imagine the team based mechanics of Killer Queen. That’s the basic concept of Too Many Cooks.
My primary objective for this project is to learn how to use various Google Cloud Platform (GCP) products, specifically Firestore, Cloud Functions, and Cloud Dataflow.
My secondary objective is to learn basic game development. For this project I will be focusing on platformer mechanics.
The initial phases of this project will be to determine the feasibility of the concept. For instance, my first question is how hard is it to build a simple platformer in Phaser 3? From there, I will need to know how to integrate Firestore to enable multiplayer gameplay.
The answer to my first question turns out to be relatively simple. In fact, the Phaser 3 website provides a tutorial on creating a basic platformer called Making your first Phaser 3 game.
The code to needed to create a basic platformer demo ends up being less than 100 lines of code.
Most of my time was spent creating usable sprites and tilemaps. Unlike with my Math RPG project, I chose not to draw my own pixel art this time. Instead I decided to use free assets from itch.io. Choosing assets proved to be difficult and in hindsight I should have simply drawn colored squares as placeholders.
I settled on an asset pack called Platform Game Assets by Bayat Games. It uses a cartnoonish vector style rather than the retro pixel style that seems popular on the itch.io game assets section.
Here is a demo of what I have so far.
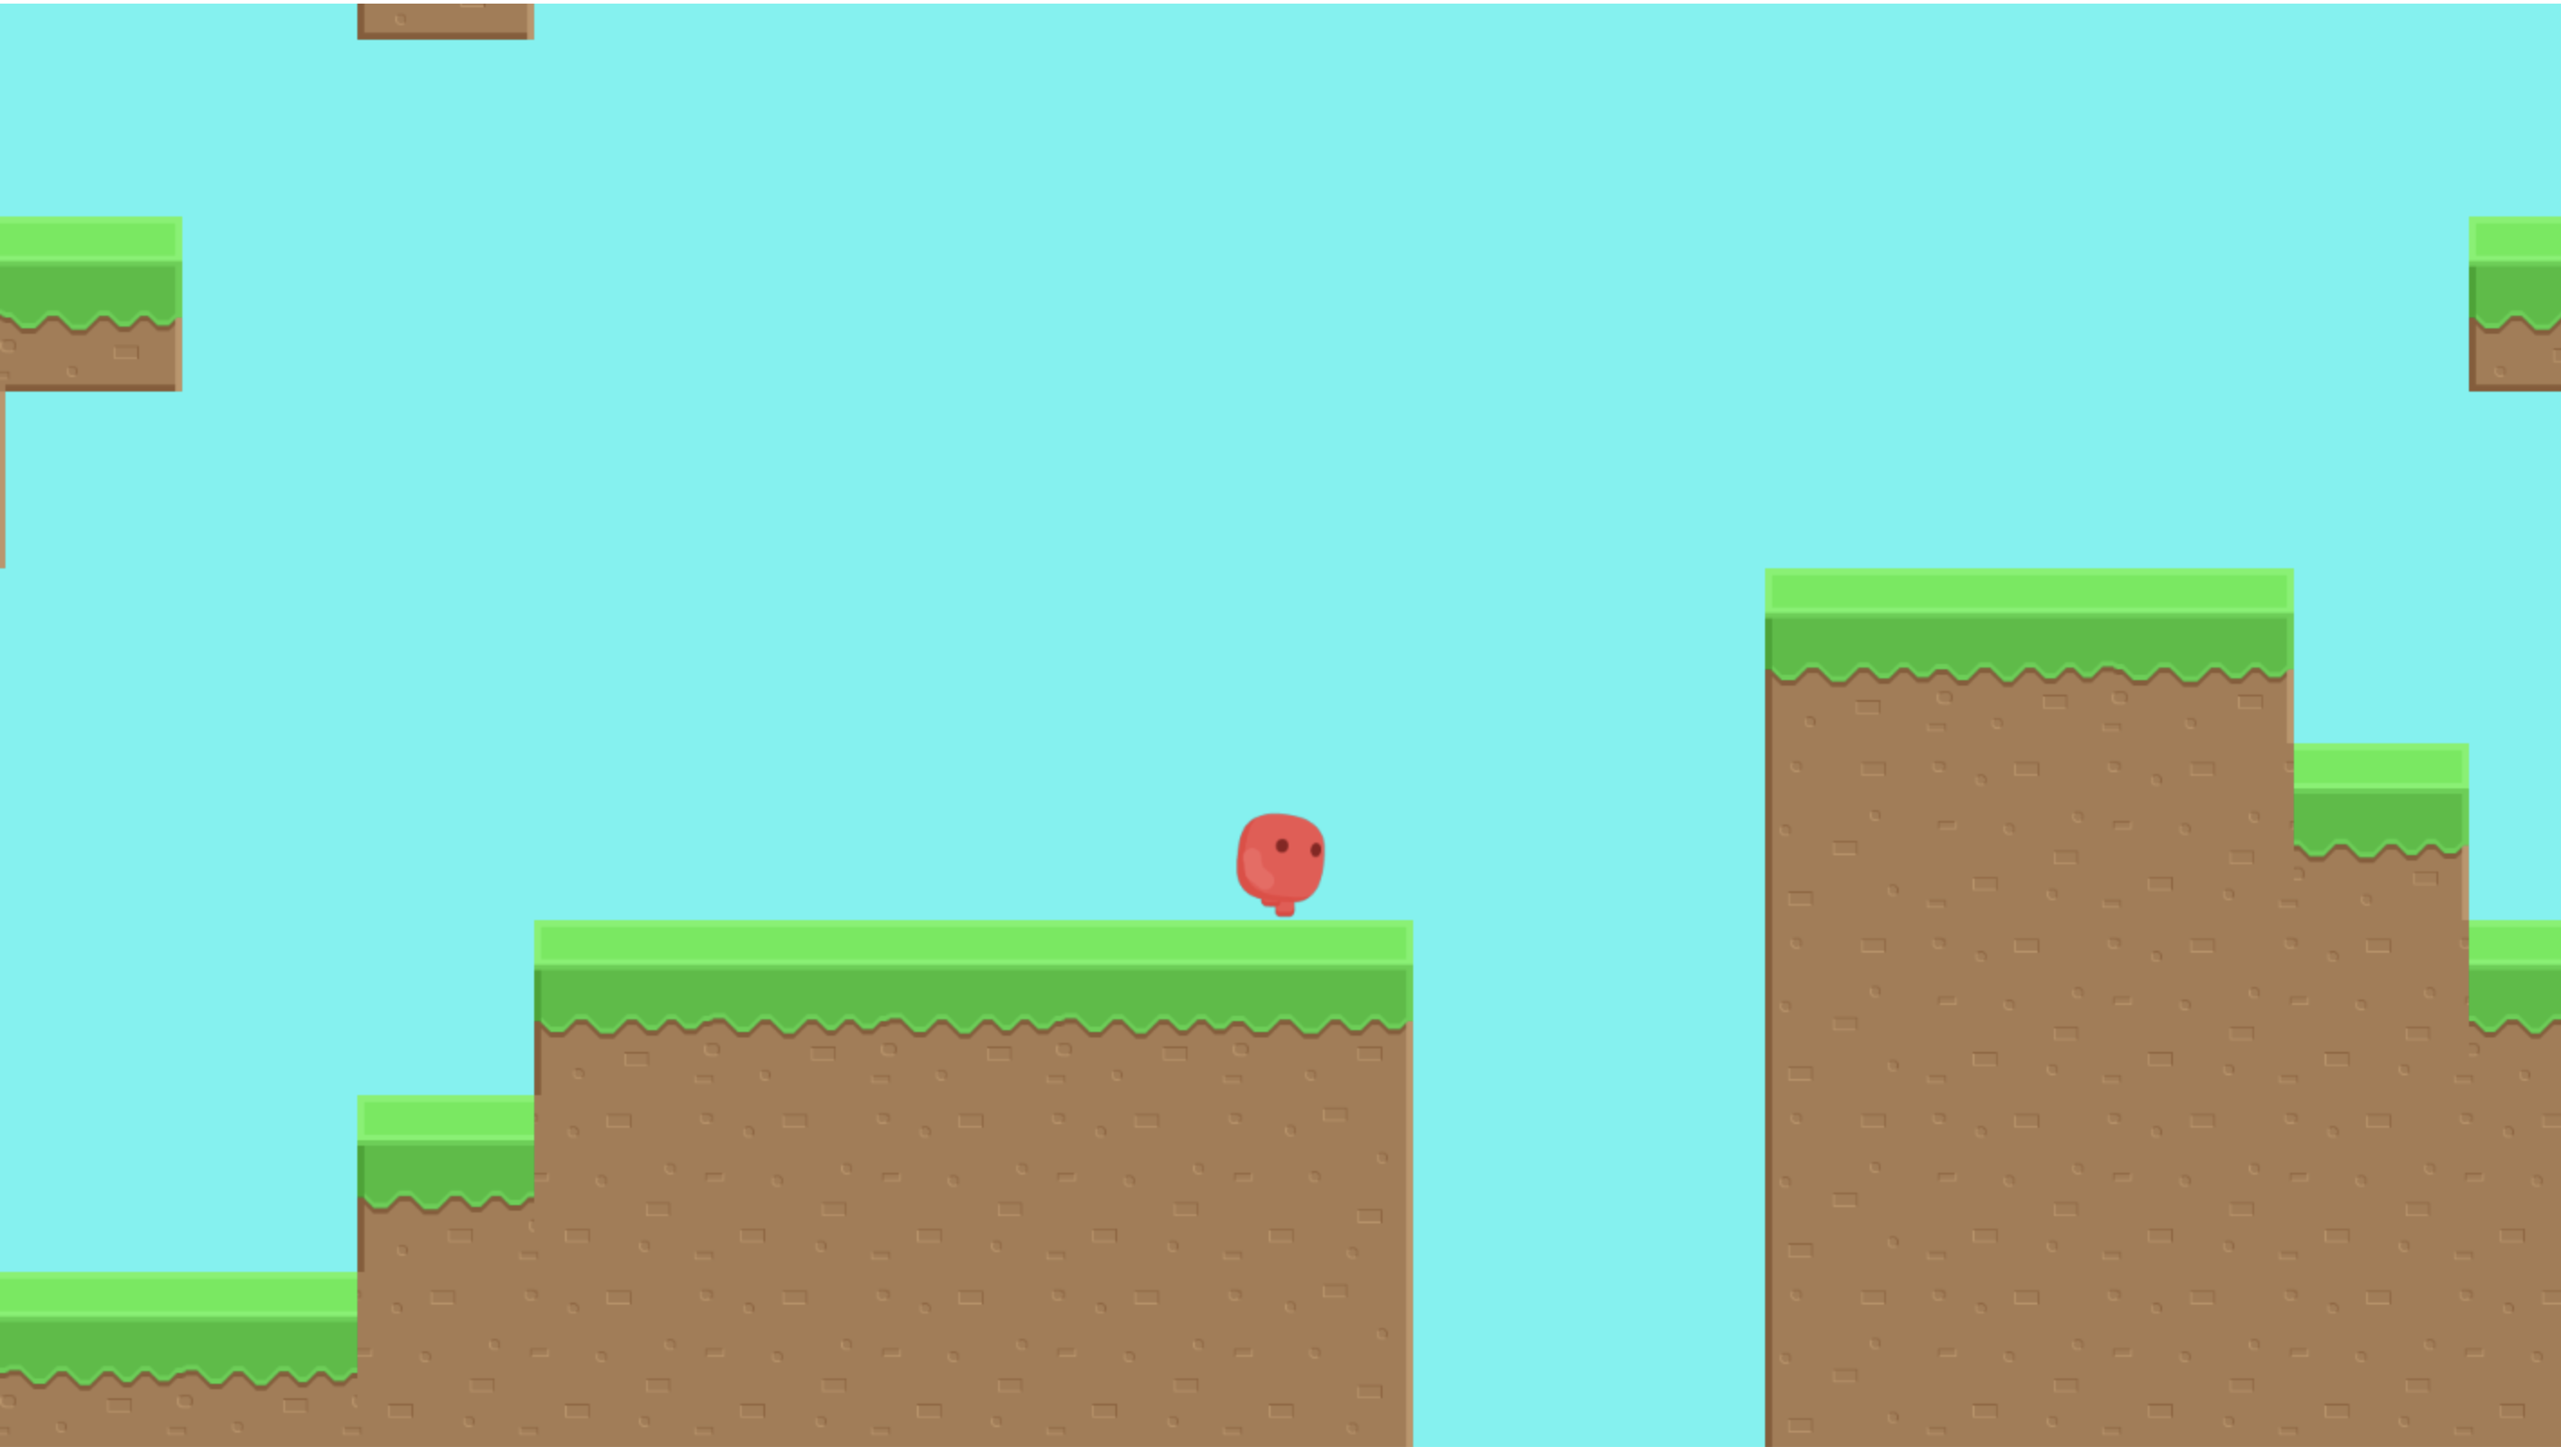
The following sections cover technical questions and challenges I encountered while developing the demo.
How do I create sprite sheets and tilemaps?
The asset pack I downloaded included the platform tiles as separate image files. I could have loaded them as separate files using this.load.image, but that seemed tedious. In addition, Tiled requires the use of tilemaps, which are essentially the separate images combined into a single image.
The asset pack also include animations for the character. These are combined into a single image, however the alignment of the images does not work well with Phaser 3. I ended up having to crop the images and create a new sprite sheet.
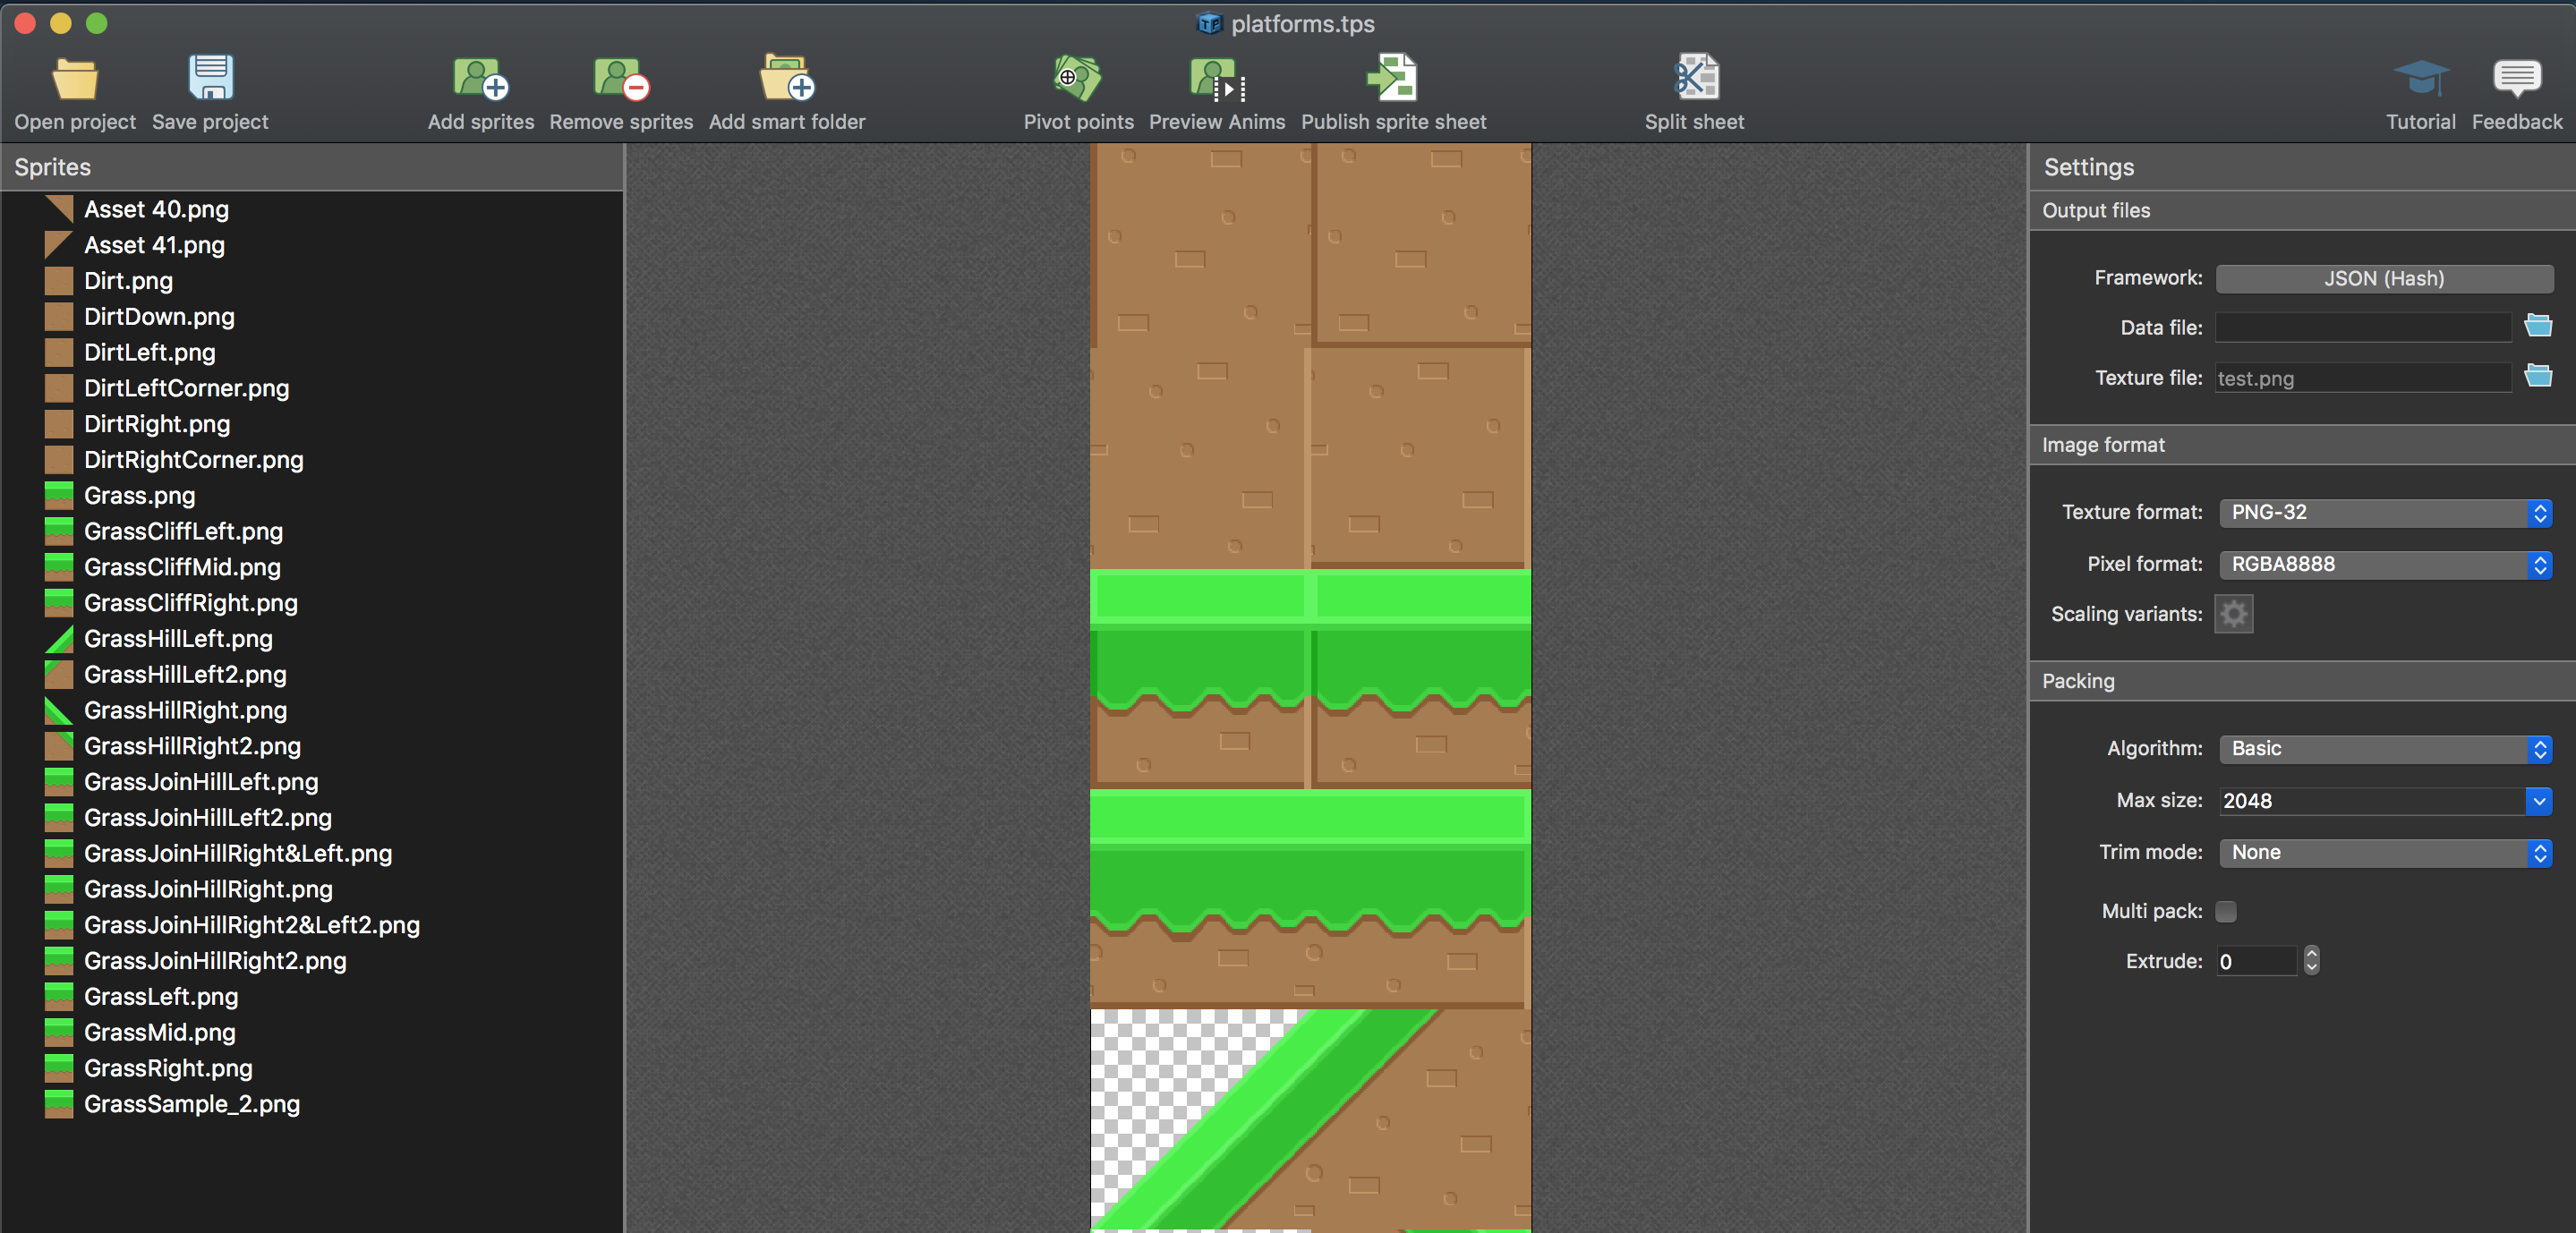
To create the sprite sheet and tilemap I used Texture Packer. It is a very intuitive application and does what you need with no hassle. The only downside is that Phaser 3 export requires the Pro version, which costs $40.
The Phaser 3 export creates a JSON output that can be used with this.load.multiatlas. Basically this tells where each image in the sprite sheet is located.
Example from the demo:
// Param 1: Name used to reference atlas later
// Param 2: Location of atlas of file
// Param 3: Directory where sprite sheet(s) are located
this.load.multiatlas('redGuy', 'assets/redGuy.json', 'assets');
How do I create a level map?
In Math RPG, I had decided to build a game engine from scratch. To create my level maps, I created a 2-D array and added integers that referenced my tiles. From there I could take the array and draw the tiles on the canvas element.
The map looked something like this:
const map = [
    [0, 0, 0, 0],
    [0, 1, 2, 0],
    [0, 0, 2, 0],
    [0, 1, 2, 0],
    [0, 1, 2, 0],
];
I could have done the same thing for this project, but instead I used an application called Tiled, which is a GUI based map/level editor. Phaser 3 provides support for Tiled via the this.load.tilemapTiledJSON method.
Usage goes something like this:
function preload() {
    // Other preload code
    this.load.tilemapTiledJSON('map', 'assets/level-1.json');
}

function create() {
    // Other create code

    // Loads tilemap
    const levelMap = this.make.tilemap({ key: 'map' });

    // Loads tilemap image and creates individual tiles and metadata
    const tiles = levelMap.addTilesetImage('platforms', 'tiles');

    // Loads tiles onto the game
    const worldLayer = levelMap.createStaticLayer('Level 1', tiles);

    // Makes it so the character can stand on platform tiles
    worldLayer.setCollisionByProperty({ collides: true });
}
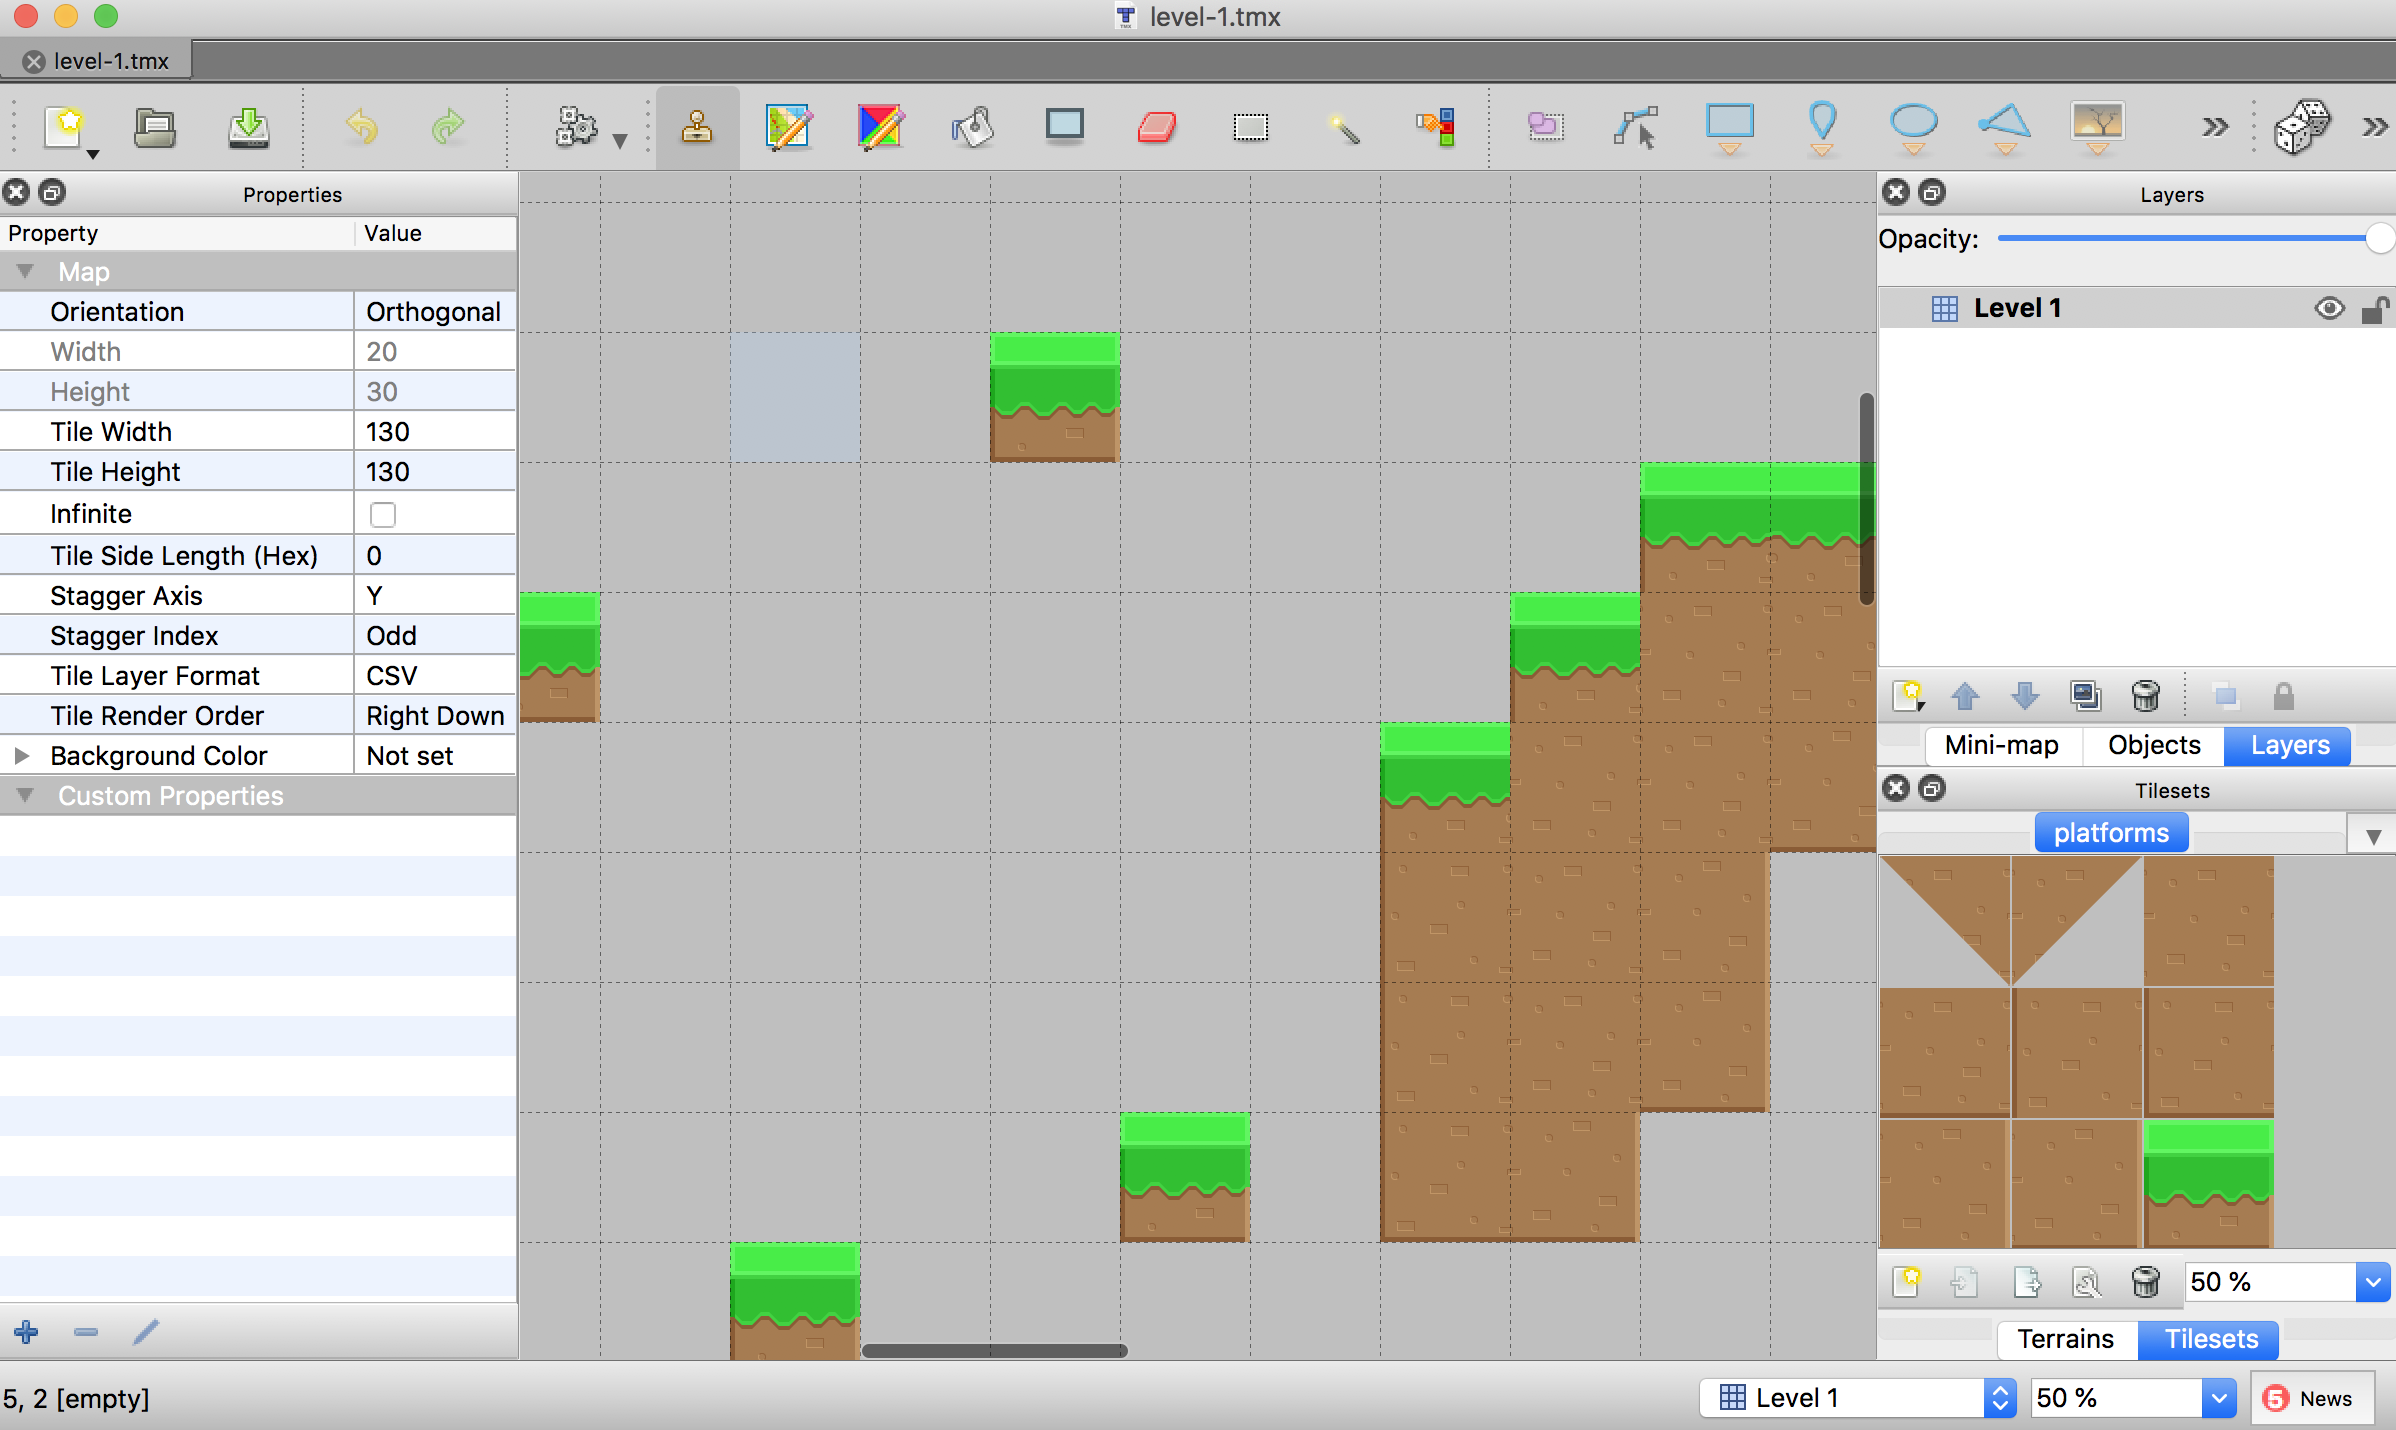
Here is a great article on how to use Tiled.
Why does Tiled not slice my tilemap correctly?
One problem I ran into with Tiled was that it initially failed to separate my tiles correctly (i.e. the squares would contain overlap into tiles).
Tiled expects each tile in the Sprite sheet to fit in consistent dimensions. So if I specify the dimensions of my tiles to be 32x32, then Tiled will divide all the tiles that way. Texture Packer does this perfectly. Just make sure to only include tiles that are the same size.
The dimensions of my tiles are 128x128, however this caused overlap in Tiled. I had to use 130x130 for the slicing to work correctly. I was not able to figure out the cause of this problem.
Make sure to embed the tilemap metadata
Tiled creates a .tsx file for the tilemap’s metadata. This includes the properties of a tile and things such as collision points.
Phaser 3 does not support this, so you will need to configure Tiled to embed the tilemap metadata into the exported JSON data rather than referencing the .tsx file.
How do I make non-square collisions?
I spent a good amount of time trying to figure this out. The simple answer seems to be that the Arcade physics option only allows square and circle hit boxes.
Phaser 3 supports Matter.js which does allow for more granular collision detection.
In Tiled, you can draw collision boxes on your individual tiles. This metadata can then be exported into the JSON file, which can be read by Phaser 3.
I believe this data can be read using setCollisionFromCollisionGroup, however this appears to have no affect with Arcade physics. I did not test this out with Matter.js.
How do I move the character around?
This turned out to be straightforward. The main thing is that the keyboard code goes into the update function which is basically the game loop.
function update() {
  cursors = this.input.keyboard.createCursorKeys();
  if (cursors.left.isDown) {
    player.setFlipX(true);
    player.setVelocityX(-200);
    player.anims.play('walk', true);

  }
  else if (cursors.right.isDown) {
    player.setFlipX(false);
    player.setVelocityX(200);
    player.anims.play('walk', true);
  }
  else {
    player.setVelocityX(0);
  }

  if (cursors.up.isDown && player.body.blocked.down) {
    player.setVelocityY(-730);
  }
}
Why can’t I jump?
In the Phaser 3 platform tutorial, the following code is used for jumping.
if (cursors.up.isDown && player.body.touching.down) {
    player.setVelocityY(-730);
}
For some reason the player.body.touching.down property never gets set to true when using tilemaps.
Instead we have to use the player.body.blocked.down property.
if (cursors.up.isDown && player.body.blocked.down) {
    player.setVelocityY(-730);
}
How do I make the screen move to the next section of the map?
One thing I spent a fair amount of time on in Math RPG was making the map scroll as the player moved around. Turns out in Phaser 3 this is very easy.
function create() {
    // Other create code

    // Sets the size of the map
    // The camera viewport is the game width/height that is set
    // when constructinga new Phaser.Game object.
    this.cameras.main.setBounds(0, 0, LEVEL_WIDTH, LEVEL_HEIGHT);

    // Make the camera follow the player as they move
    this.cameras.main.startFollow(player, true);

    // Can change the zoom
    this.cameras.main.setZoom(0.75);
}
How do I animate my character?
I only understand the basics of creating an animation.
First we need a sprite sheet (though I think it’s possible to also use individual images):

Then we load the sprite sheet into our atlas:
function preload() {
    this.load.multiatlas('redGuy', 'assets/redGuy.json', 'assets');
}
Next create an animation:
function create() {
    // The list of frames to make the animation
    // In this case a walking animation
    const frameNames = [
        { key: 'redGuy', frame: 'c5.png' },
        { key: 'redGuy', frame: 'c1.png' },
        { key: 'redGuy', frame: 'c2.png' },
        { key: 'redGuy', frame: 'c3.png' },
        { key: 'redGuy', frame: 'c4.png' },
        { key: 'redGuy', frame: 'c5.png' },
    ]

    // Creates the animation to be used later by referencing the `walk` key
    this.anims.create({ key: 'walk', frames: frameNames, frameRate: 20 });
}
Finally using the animation (to be used in the update function):
player.anims.play('walk', true);
Full code snippet
I haven’t created a Github repo for this project yet, so I’ll just post the code snippet for the demo here.
const LEVEL_HEIGHT = 3900;
const LEVEL_WIDTH = 2600;

const game = new Phaser.Game({
  type: Phaser.AUTO,
  width: 1420,
  height: 800,
  physics: {
    default: 'arcade',
    arcade: {
      gravity: { y: 300 },
      debug: false,
    },
  },
  scene: {
    preload: preload,
    create: create,
    update: update,
  },
});

var player;

function preload() {
  this.load.image('sky', 'assets/sky.png');
  this.load.image('tiles', 'assets/platforms.png');
  this.load.tilemapTiledJSON('map', 'assets/level-1.json');
  this.load.multiatlas('redGuy', 'assets/redGuy.json', 'assets');
}

function create() {
  this.cameras.main.setBounds(0, 0, LEVEL_WIDTH, LEVEL_HEIGHT);
  this.add.sprite(LEVEL_WIDTH / 2, LEVEL_HEIGHT / 2, 'sky').setDisplaySize(LEVEL_WIDTH, LEVEL_HEIGHT);

  const levelMap = this.make.tilemap({ key: 'map' });
  const tiles = levelMap.addTilesetImage('platforms', 'tiles');
  const worldLayer = levelMap.createDynamicLayer('Level 1', tiles);
  worldLayer.setCollisionByProperty({ collides: true });

  player = this.physics.add.sprite(64, 3400, 'redGuy', 'c5.png');
  player.setBounce(0.2);
  player.body.setGravityY(300);
  player.setCollideWorldBounds(false);

  this.cameras.main.startFollow(player, true);
  this.cameras.main.setZoom(0.75);

  this.physics.add.collider(player, worldLayer);

  const frameNames = [
    { key: 'redGuy', frame: 'c5.png' },
    { key: 'redGuy', frame: 'c1.png' },
    { key: 'redGuy', frame: 'c2.png' },
    { key: 'redGuy', frame: 'c3.png' },
    { key: 'redGuy', frame: 'c4.png' },
    { key: 'redGuy', frame: 'c5.png' },
  ]
  this.anims.create({ key: 'walk', frames: frameNames, frameRate: 20 });
}

function update() {
  cursors = this.input.keyboard.createCursorKeys();
  if (cursors.left.isDown) {
    player.setFlipX(true);
    player.setVelocityX(-200);
    player.anims.play('walk', true);

  }
  else if (cursors.right.isDown) {
    player.setFlipX(false);
    player.setVelocityX(200);
    player.anims.play('walk', true);
  }
  else {
    player.setVelocityX(0);
  }

  if (cursors.up.isDown && player.body.blocked.down) {
    player.setVelocityY(-730);
  }
}